Are you ready to learn about workload portability to any cloud with HCX? Is your datacenter hardware getting older and support cost sky rocketing? Would you would prefer to spend that allocated budget in cloud resources instead of lift and shift strategy on-premise? You are in the correct place then!
Below are some detailed step by step instructions how to migrate VMs from vCenter to vCenter, no matter where it resides.
- Login to vCenter or HCX directly with an account that has Administrator permissions
- Go to Services > Migration
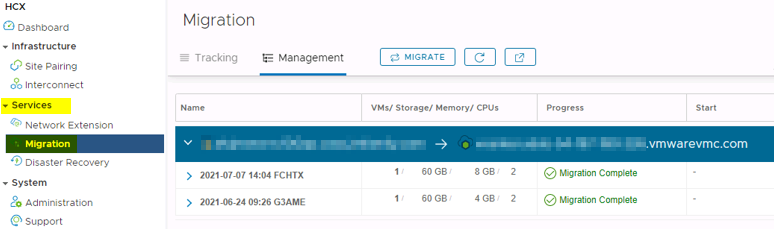
- Select Migrate
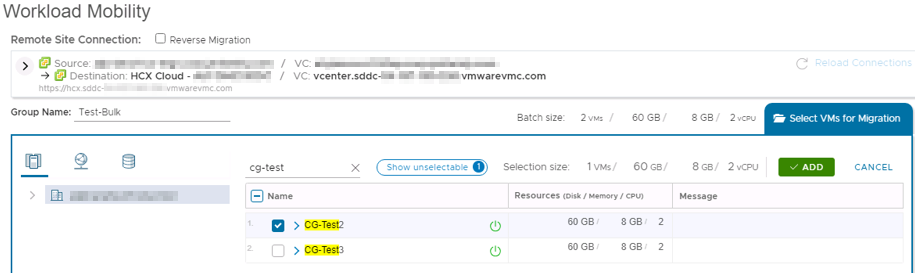
- Search and select VMs that will be migrated, then Add
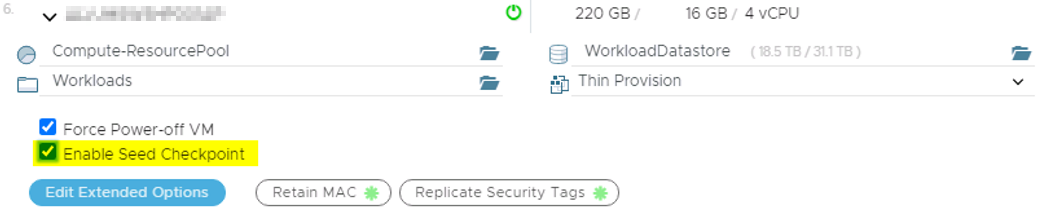
- Transfer and Placement, select all the necessary options.
- Compute Container: Compute-ResourcePool
- Storage: WorkloadDatastore
- Migration Profile: Bulk Migration or Replication-assisted vMotion are the most common bulk migrations
- Destination Folder: SDDC-DataCenter > Workloads
- Virtual Disk Format: Thin Provision
- Switchover Schedule: Maintenance Windows time range
- Switchover options:
- Force Power-off VM
- Remove Snapshots
- Force unmount ISO Images
- Extended Options:
- Retain MAC
- Upgrade Virtual Hardware
- Upgrade VMware Tools
- Deactivate Per-VM EVC
- Personalization Script
- DNS Customization
- Generate a new Security Identifier (SID)
- Replicate Security Tags > Apply Option
- Migrate Custom Attributes

- Validate and make sure all the VMs passed the health checks.
- Select GO to start syncing the data.

- Wait for the data sync to complete.
- Once the data is synced, migrations will be on standby mode waiting for the maintenance window
- When the maintenance window is reached, migration starts
- Reboot will be required if Bulk Migration was selected, otherwise RAV will migrate the VM online.
- Once completed, validate the new VM is available on VMC vCenter
- Proceed to migrate more VMs!
Some of the lessons I have learned myself after migrating my fair share of VMs:
- Always select “Force Power-Off VM” for Bulk Migrations otherwise the migration will fail if the VM takes longer than 100 seconds to shut down.
- When using Bulk Migration, make sure to expand each VM and select “Enable Seed Checkpoints” in case the migration fails for whatever reason, you do not have to start syncing the data from scratch.
- Replication-assisted vMotion will not work with VMs that have independent persistent disks or disks with sizes that cannot be divided by 1024k. Luckily you can leverage Bulk Migration for those instead.